Getting started
Welcome! Setting up Upselly takes about five minutes. Here’s the whole journey, start to finish.
1. Install the app
Section titled “1. Install the app”Install Upselly from the Shopify App Store. Once installed, you’ll land on the Upselly Home screen inside your Shopify admin.
2. Enable the theme app embed
Section titled “2. Enable the theme app embed”Upselly’s widgets render through a theme app embed — Shopify’s safe, no-code way to add functionality to your storefront (nothing in your theme files is ever modified).
- In your Shopify admin, go to Online Store → Themes → Customize.
- Open App embeds (the puzzle-piece icon in the left sidebar).
- Toggle Upselly on and click Save.
That’s it — Upselly can now appear on your storefront. Nothing shows until you publish an offer, so there’s no risk of surprises.
3. Create your first offer
Section titled “3. Create your first offer”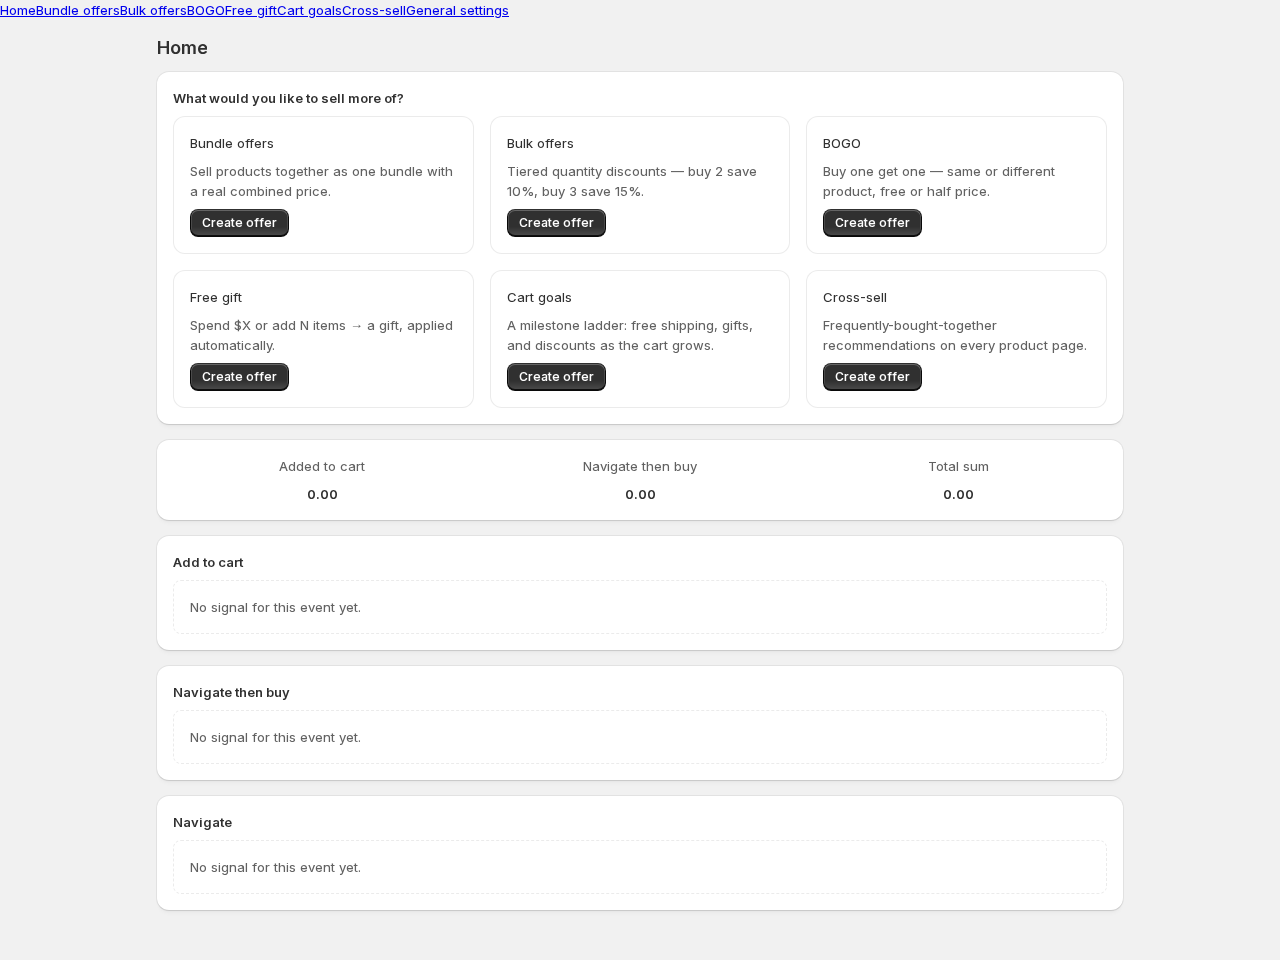
From Upselly’s Home screen, pick what you’d like to sell more of. Every offer type starts from a template gallery — pick one that matches your goal, and the live preview shows exactly what shoppers will see:
Pick your products, adjust the discount, and hit Save (or Publish for bundles). Your offer is live.
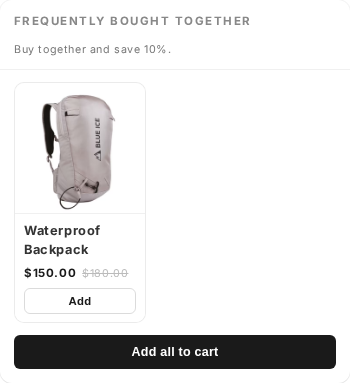
4. Check it on your storefront
Section titled “4. Check it on your storefront”Open one of the offer’s product pages on your storefront — the widget appears right there, styled to match your theme. Every detail page also links you straight to the right product page.
How discounts work (the honest part)
Section titled “How discounts work (the honest part)”Every Upselly offer is backed by a real Shopify automatic discount. When a shopper’s cart qualifies, the discount is applied at checkout by Shopify itself — with the offer’s name shown right on the checkout page. No fake $0 products, no draft-order tricks. If you pause an offer, its discount stops immediately.
Next steps
Section titled “Next steps”- Set up translations if you sell in more than one language.
- Review general settings — widget visibility, exclusions and more.